
If your first reaction was “ew,” I’m right there with you. I’ve taken several steps towards a zero-waste kitchen in my home, but I couldn’t get past the ick factor of kitchen sponges. They’re smelly and squishy and full of food bits. And who wants to think about dirty dishes unless you’re actually doing the dishes?
But having a low-waste kitchen is important to me, and I feel uncomfortable about the rate at which we use and discard our dish sponges. I decided it’s time to give this reusable-sponge thing a try.
Having had zero experience with making my own dish scrubbers, I took to the fiberoptic streets of Pinterest for advice. What I found surprised me: the available tutorials vary dramatically in their approaches. Some scrubbers have foam sponges inside; others are flat or hollow. Some are made of fabric, others made from twine or yarn, and some are made purely from recycled materials. I didn’t know which would work best, so I went with the craftaholic’s default choice: try them all!
In the end, I selected five styles, each using different construction techniques and materials. I made one of each and then took them out for a test spin at the sink. It made washing the dishes almost tolerable! Finally, I dropped them all into the laundry to see how they fared there.
The results of my experiment are below (spoiler alert: I had a clear favorite!), followed by my own tutorial based on what I learned. But first, a few caveats! First and foremost, I’m not an expert on the impact of various materials on dishware or our health, so please don’t ruin your favorite dishes or use a material that you think may harm your family. Secondly, I own a dishwasher, so my goal when washing my dishes was only to get them clean enough to put in the dishwasher (although there were several items that I preferred to wash by hand.) Thirdly, I used each sponge for a limited time so as to not spend an entire year researching for this article, so I can’t speak to exactly how long each of these will last.
1. The basic sewn scrubber
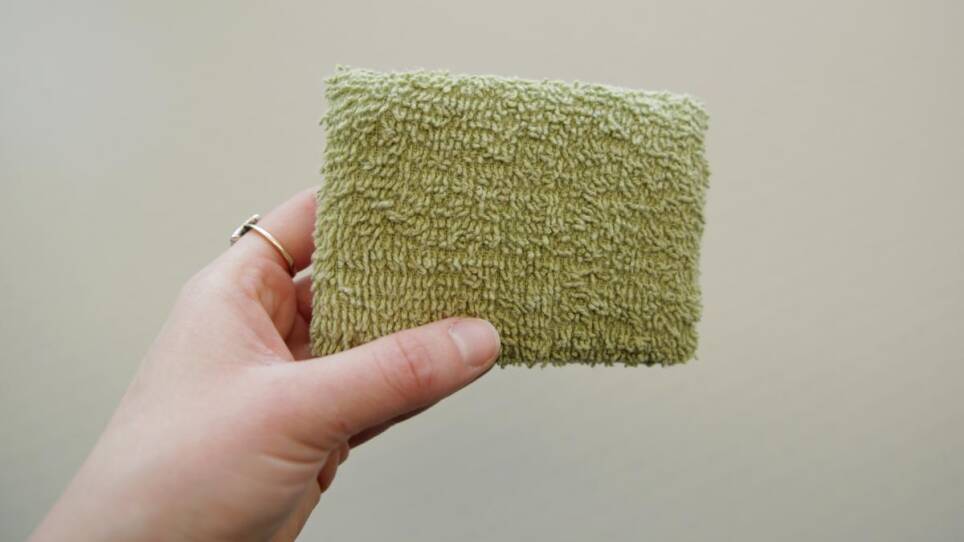
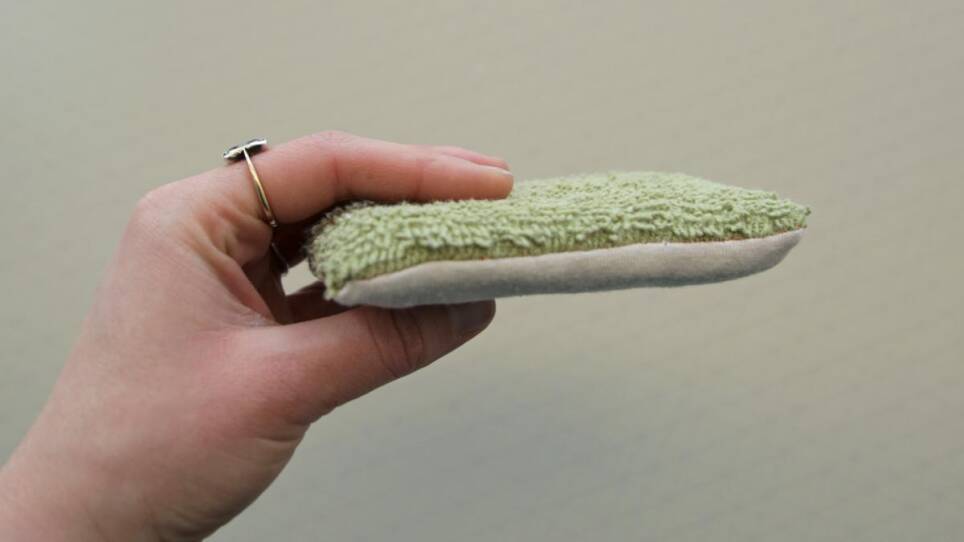
I looked at tutorials like this one from Leader Sews for inspiration for this scrubber. Made by sandwiching mildew-resistant foam between two pieces of fabric (I used a piece from an old hand towel and a piece from an old cotton shirt), this version looks the most similar to my regular sponges. It was fun to make but virtually ineffective at the sink. The towel side couldn’t get enough traction and slid right over the stuck-on food bits, and the foam seemed to slide around inside. All in all, a bit of a disappointment, since I was already dreaming about all of the fun novelty prints I could use for the smooth side. But in this scrubber’s defense, it fared quite well in the washer and dryer!
2. The fruit netting scrubber
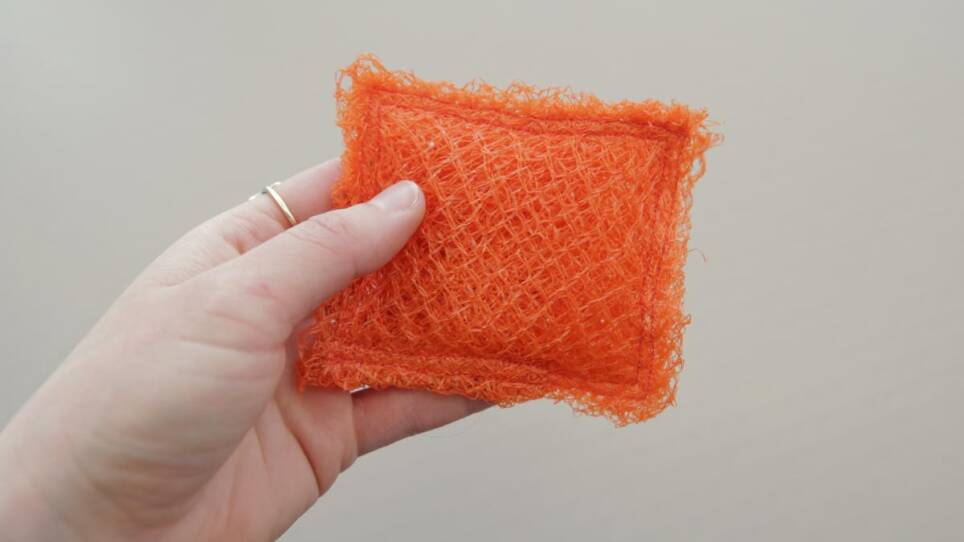
I would never have thought to do this, but this tutorial from Capper’s Farmer convinced me to give it a try! This scrubber took me less than five minutes to make, start to finish: you remove the netting from your fruit purchase (I’d acquired a bag of oranges from the grocery store for this purpose), fold it until it forms a small rectangle, and sew around the edge twice. What could be easier than that? And miraculously, it worked! The texture of the netting was perfect for getting traction on dirty dishware, and very little food particles made it through the netting and got stuck. However, it did get a bit flimsy when soaked in water, and the dryer did a number on it, but all in all, it’s a great use for something that would otherwise be tossed away automatically. I definitely plan to do this in the future when I buy fruit with netting!
3. The knitted twine scrubber

I had high hopes for this one, mostly because the tutorials I followed (like this one from Cashmere and Plaid and this one from The Beauty in Simple) made had their scrubbers looking absolutely glamorous. (Did I really just say that?) But I’m not sure if the issue was the size (it turned out way too big) or with the quality of twine I purchased (it shed the whole time I was making it, and then immediately went limp under water), but this one just did not work for me. I went with a garter stitch on one side and a stockinette stitch on the other (take a look here if you have no idea what I’m talking about, but want to know), and the garter stitch was slightly better at scrubbing stuck-on food off plates, but still. Not a fan.
4. The woven sock scrubber
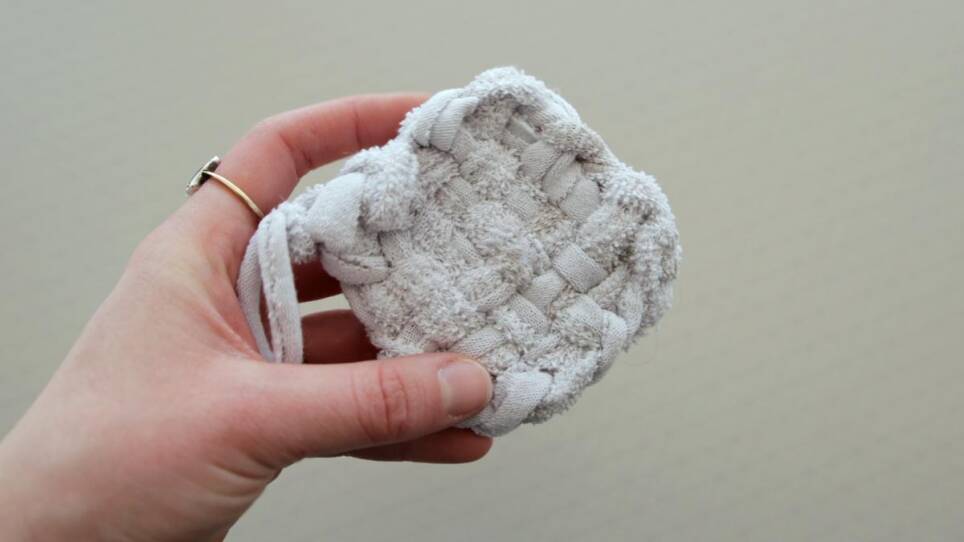
This was by far the most fun to make, but also the most disappointing. The weaving technique that I used (also known as tawashi, demonstrated here by Eco DIY and here in French by Bambichoses) was quick and easy, but I used two old socks (as recommended by the Pinterest experts) and this was not successful. I think I was transfixed by adorable weaving technique, because in retrospect, I’m not sure what made me think that my socks would be good for cleaning my dishes. They absorbed a lot of water, had very little scrubbing power, and would not dry. Like, ever.
5. The crocheted tulle scrubber
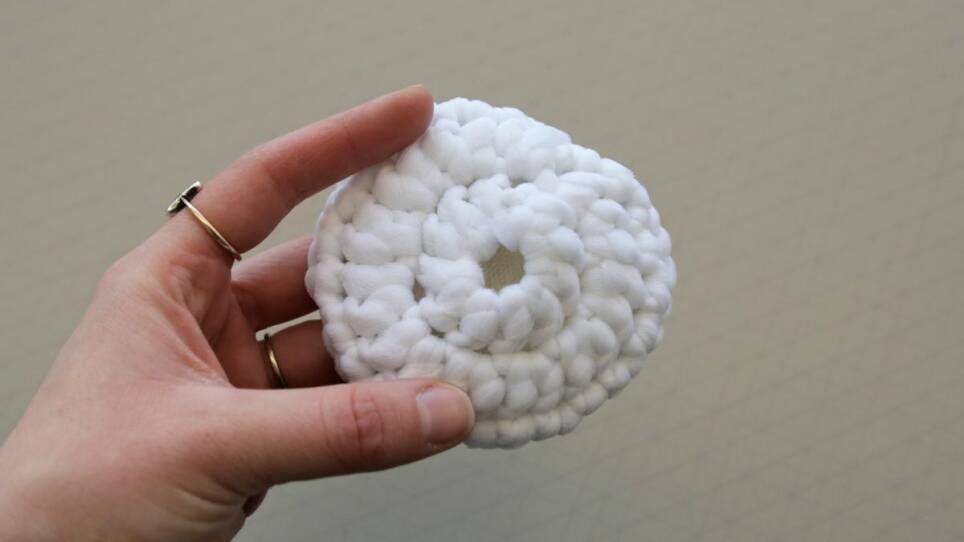
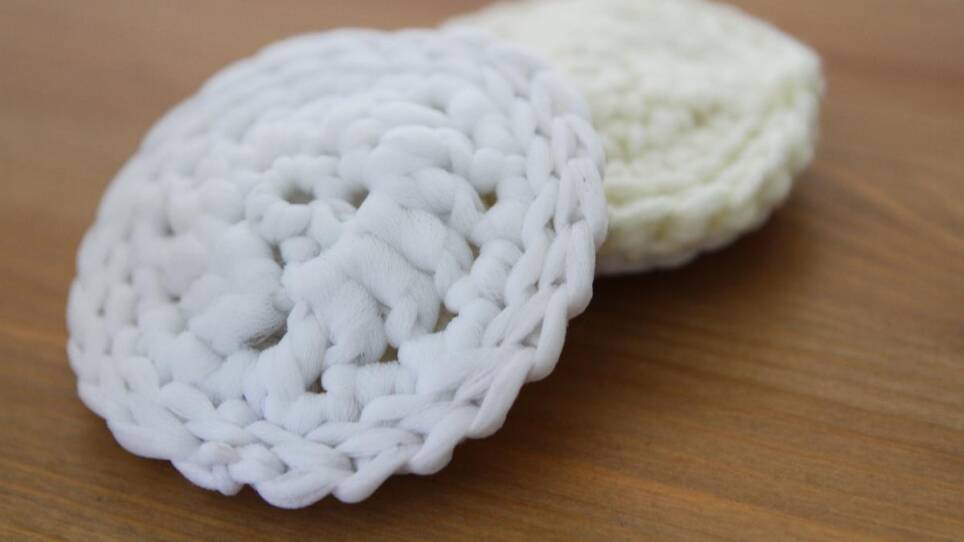
I saved the best for last! This technique and material worked amazingly well. I followed the super-simple tutorial from Try Everything and made my scrubber in minutes. The tulle side had great scrubbing power and the yarn side was comfortable to hold. The scrubber got wet without getting too wet, and dried quickly. My only concern was that the hole in the middle of the tulle was like an open mouth just asking for food to get stuck inside, and I didn’t love the way yarn pulled the tulle at the back. But otherwise, I was a happy camper! And the discoloration of the tulle caused by the gallons of tomato sauce we’d eaten that week nearly disappeared after a good spray of stain remover and a spin in the laundry machine.
So after several weeks of experimenting, I took what I learned and created my own take on the crocheted tulle scrubber:
(Note: this is a beginner crochet pattern, but it does require an understanding of the fundamental crocheting techniques. If you are interested in learning how to crochet, there are amazing resources all over the Internet or at your local yarn store.)
What you’ll need:

- Tulle ribbon (find it for mere dollars and a variety of colors at your local craft store)
- Yarn
- Crochet hook (I used a size K/6.5mm, but you can use whatever feels comfortable)
- Tapestry needle
- Scissors
How to get the look:
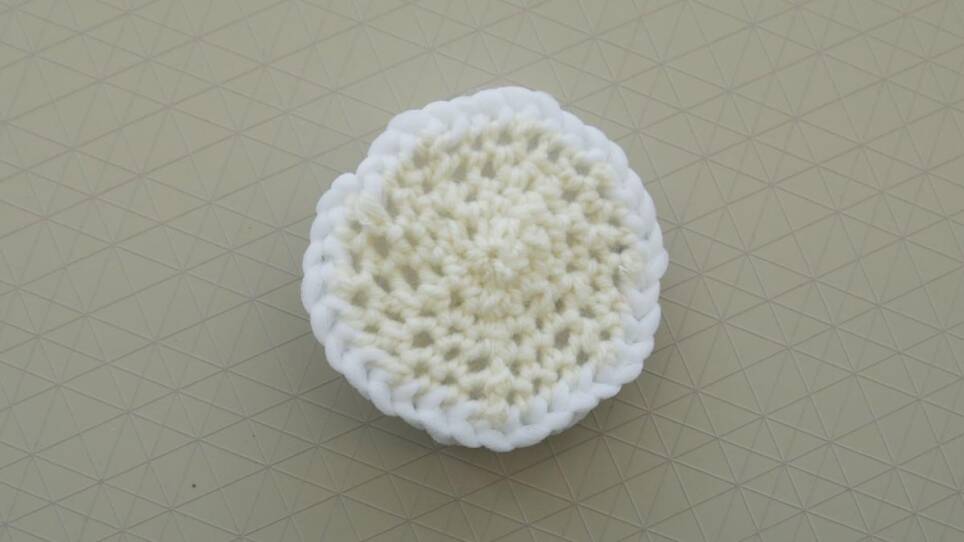
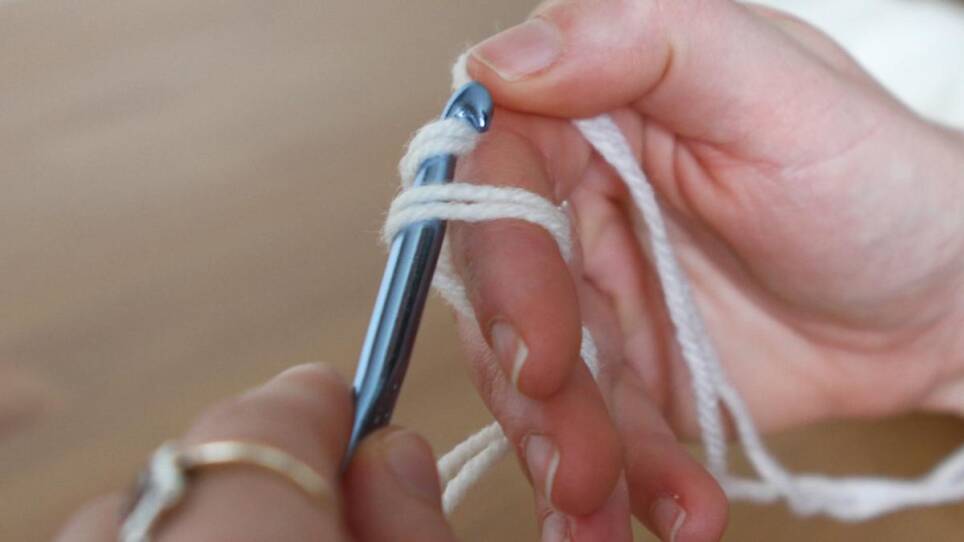
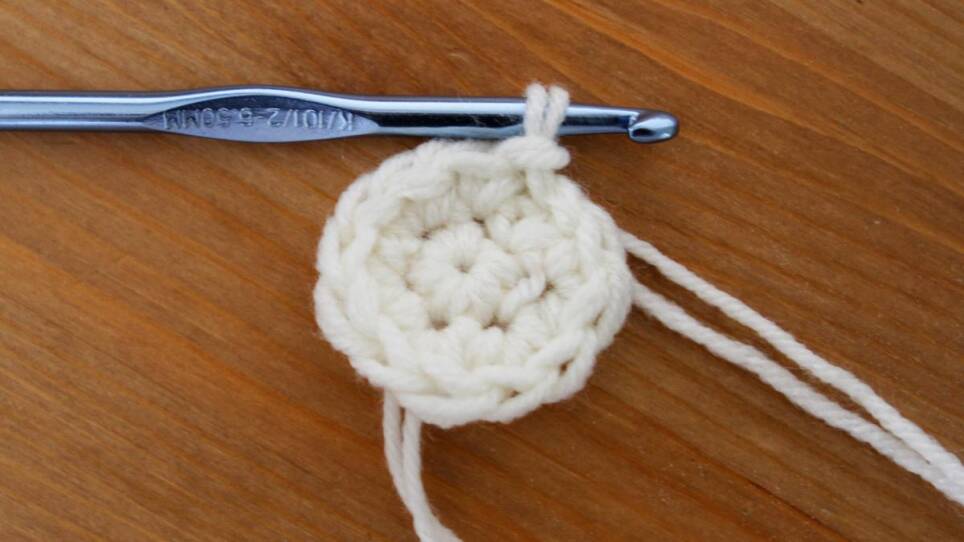
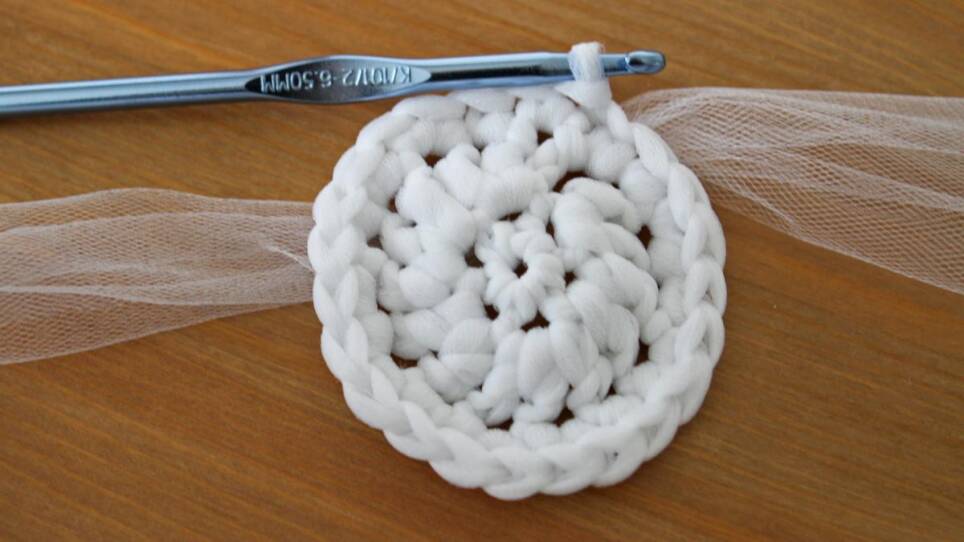
1. Take both ends of the ball of yarn and use the magic circle method to begin. (You can use just one thread of the yard, or use a thicker yarn, but I went with two threads to get the extra thickness and texture.) Not sure how to do a magic circle? Here’s a video from Hello Yellow Yarnthat will show you how. It’s a great way to eliminate the big hole in the middle that was problematic on my tester version!
2. Round 1: Single crochet 6 times into the magic circle, then pull the end to close the hole.
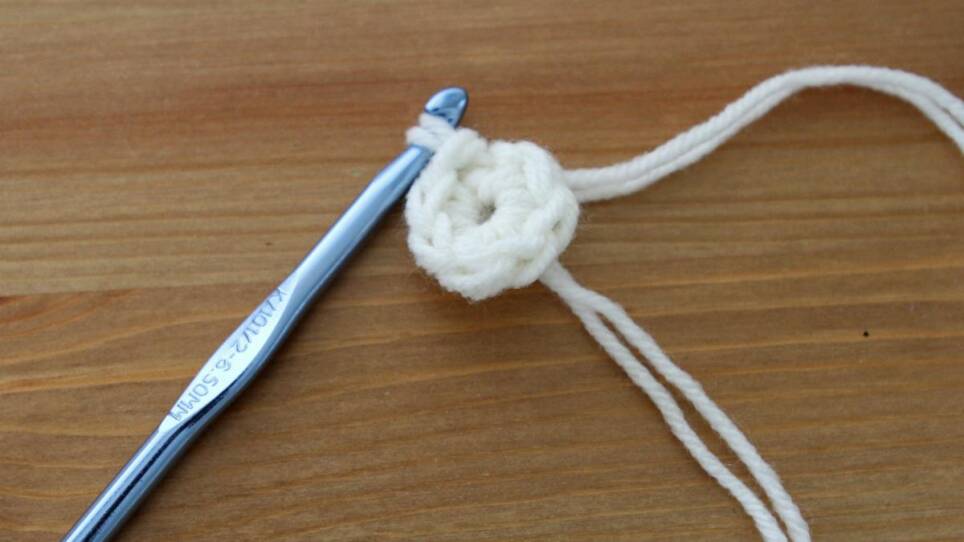
3. Round 2: Single crochet twice in each single crochet from round 1. You should end up with 12 sc at the end of the round.
4. Round 3: Single crochet twice in the first stitch, then once in the next one. Repeat all the way around for a total of 18 sc.
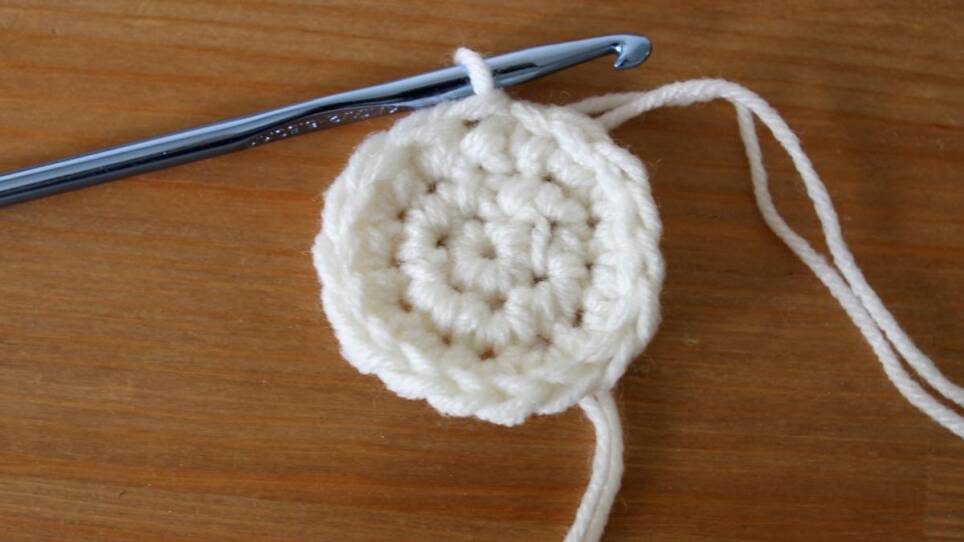
5. Round 4: Single crochet twice in the first stitch, then one in the next two stitches. Repeat all the way around for a total of 24 sc.
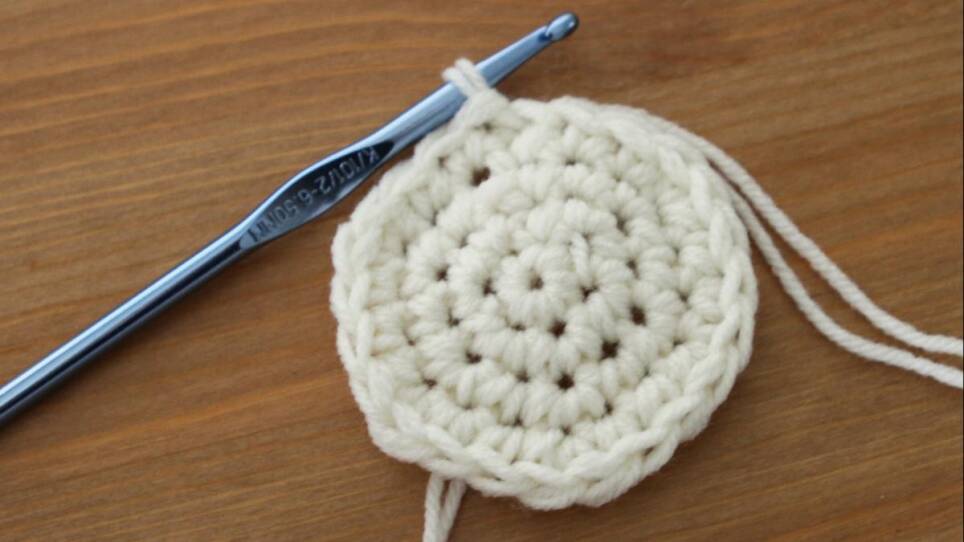
6. Fasten off the ends and cut off the excess yarn. The tails will be tucked into the scrubber, so leave them as one or two inches in length on either side.

7. Using the tulle ribbon, make a magic circle.

8. Round 1: Single crochet 6 times into the magic circle, then pull the end to close the hole.

9. Round 2: Double crochet 3 times into the first stitch, then double crochet 2 times into the second stitch. Repeat all the way around for a total of 15 dc.
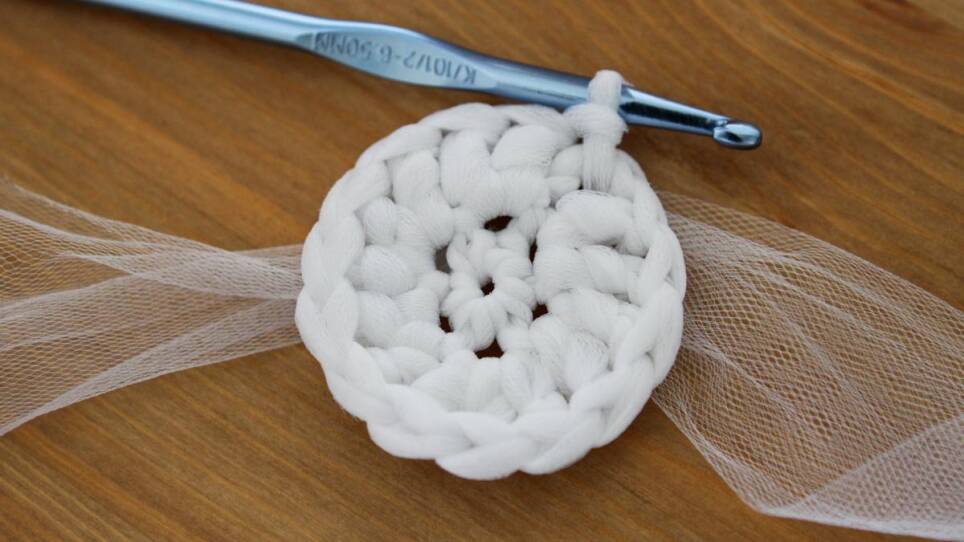
10. Round 3: Single crochet twice in the first stitch, then single crochet once in the second stitch. Repeat all the way around (ending on a stitch with two sc) for a total of 23 stitches.
11. Hold the tulle and yarn disks back to back, with wrong sides together.
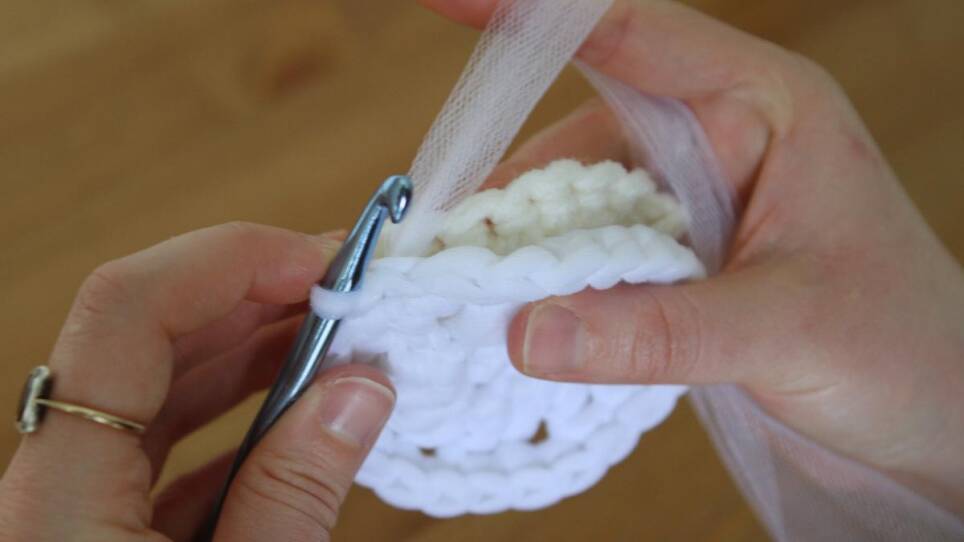
12. Single crochet through the back loops of both disks at the same time to attach them together. (Alternatively, you can use your tapestry needle to sew them together for a less visible seam.) Trap all of the loose ends in between the two disks as you crochet them together.

This is how it will look as you make your way around.

13. At the end of the round, fasten off the tulle ribbon and cut it off, leaving a 2-3 inch tail. Use your tapestry needle to weave in the tulle end.
And there you have it: a quick but durable sponge for all your dish washing needs!

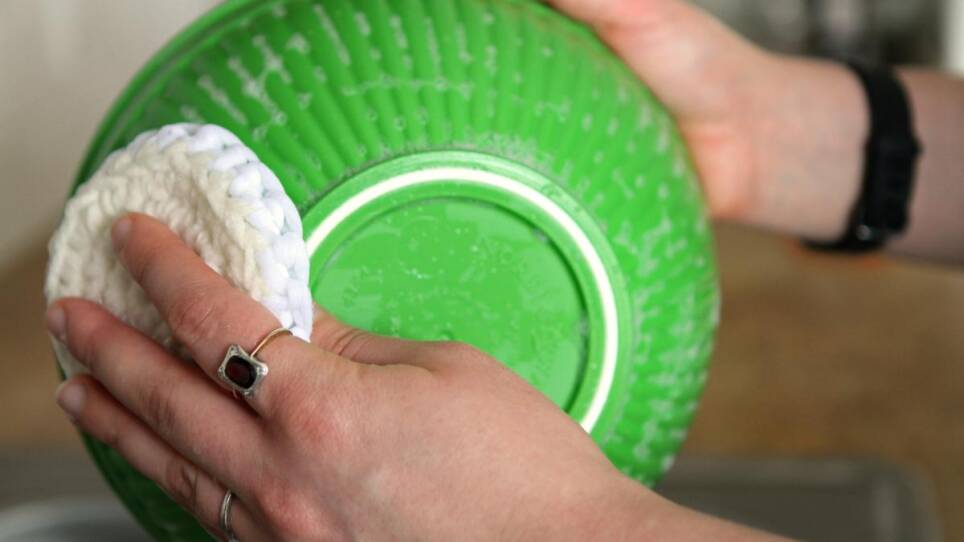
When it gets too dirty for your liking, spray with a bit of stain remover, throw it in the laundry, and reuse!
Happy washing!


