Table of Contents
Introduction
Educational Issues for Students With Disabilities
Educational Policies and Standards
Disabilities, Functional Limitations and Accessibility Tips
Types of Assistive Technologies
Access Issues for Selected Development Environments
Guideline A: Images
Guideline B: Forms
Guideline C: Tables
Guideline D: Digital Publications
Guideline E: Interactivity
Guideline F: Graphs
Guideline G: Math
Guideline H: Multimedia
Guideline I: Multimedia in E-books
Guideline J: Multimedia in DTBs
ADM Guidelines: Appendices
Acknowledgements
Expanded Table of Contents
Many of the resources referenced are no longer available, and links to them have been removed.
Provide access to multimedia presentations for users with sensory disabilities.
Audio descriptions provide access to multimedia for people who are blind or visually impaired by adding narration that describes the visuals, including action, scene changes, graphics and on-screen text. Captions added to multimedia presentations ensure that the audio components of the presentation are accessible to individuals who are deaf or hard-of-hearing. Both audio descriptions and captions are useful learning tools for a wide array of users in addition to their originally intended audiences. Captions can provide a powerful search capability, allowing users to search the caption text to locate a specific video, or an exact point in a video. They are also useful for people learning to read or learning English as a second language. Audio descriptions can assist students with learning disabilities by reinforcing through audio what the user is watching on the screen.
Captions and audio descriptions may be integrated into multimedia as a user-selectable option (closed) or permanently recorded along with the main audio or video (open). Closed captions and descriptions may be toggled on and off by the user via a preferences setting, a menu option or, in some cases, a button on the player interface. Open captions and descriptions may not be turned off-everyone sees or hears them, whether they want to or not.
Creating Accessible Multimedia
There are two markup formats that support the inclusion of audio descriptions and/or closed captions in digital multimedia presentations-Synchronized Multimedia Integration Language (SMIL) and Synchronized Accessible Media Interchange (SAMI). SMIL is played by the QuickTime Player, RealPlayer, the Oratrix GRiNS Player and the Ambulant Player. SAMI is played solely by the Windows Media Player. A free utility, the Media Access Generator (MAGpie), can be used to create captions and audio descriptions for SMIL presentations, and captions only for SAMI and Adobe Flash presentations.
Authors of e-books and digital talking books can integrate accessible multimedia into these materials. Some e-book formats, such as PDF, allow multimedia to be embedded directly into the book. DTBs can accommodate accessible in-line audio clips, and at least one software DTB device supports embedded video. See Guideline I and Guideline J for complete information on adding accessible multimedia to electronic texts.
SMIL
SMIL was developed by the World Wide Web Consortium (W3C), an international industry consortium that publishes protocols for the Web. SMIL 2.1 is the latest version of the specification, published in 2005. SMIL multimedia presentations are made up of elements-sound, video, pictures and text-that are stored separately and then synchronized at the time of playback. SMIL-formatted multimedia can be delivered via the Internet or a local file system via hard drive, CD or DVD. Visit the W3C's Synchronized Multimedia page for complete information about SMIL and related activities at the W3C.
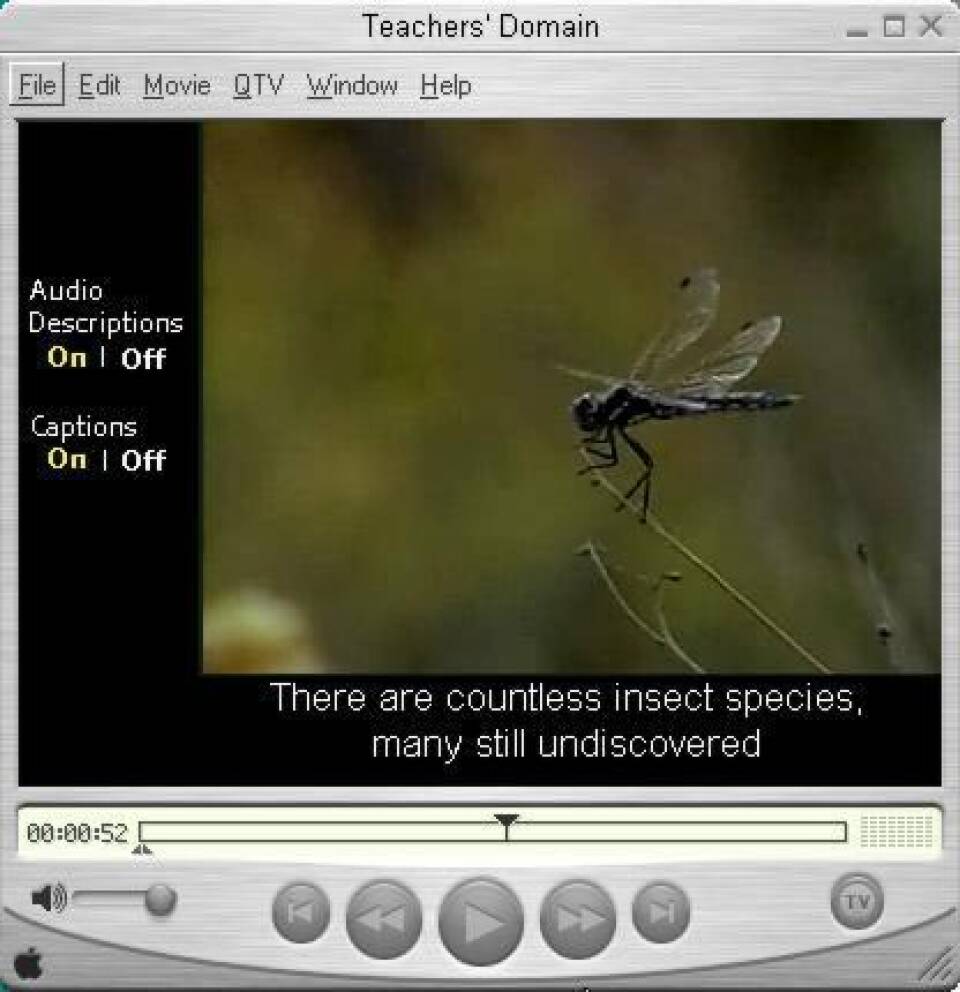
When authored correctly, SMIL allows users to turn captions and descriptions on and off via a player interface. The QuickTime Player, GRiNS Player, Ambulant Player and RealPlayer each provide a menu selection or dialog box for this feature, but for better accessibility authors should consider adding accessible buttons to the player interface for easier toggling of tracks. In fact, this is crucial when embedding a player into a Web page. Below is a picture of caption and description buttons integrated into the QuickTime Player interface.
Take note that different SMIL players provide varying levels of implementation-- in other words, some players implement the entire specification, and some use only parts of it. Also, not all of SMIL's accessibility features are supported by all SMIL players. In these cases, we offer workaround solutions that will work with existing players.
SAMI
SAMI is a Microsoft public specification that allows closed captions to be played in the Windows Media Player on the Windows OS only. When the Windows Media Player is used as a stand-alone player, viewers can turn the captions on and off using a menu selection. However, when the player is embedded in another application, such as a Web page, the developer must provide the toggling feature through a button in the application's interface. For additional flexibility, this interface can also provide options to change the font size or text color.
At the time of this writing, SAMI does not support closed audio descriptions. Instead, descriptions must be recorded permanently as open descriptions directly into a video's regular soundtrack. If this approach is used, authors should also provide a separate version of the video with the original program audio (without audio descriptions).
Flash
Flash is an animation technology from Adobe Systems, Inc.. Multimedia presentations authored in Flash can contain large amounts of information yet still remain reasonable in data size, making them easy to download and play. Since Flash uses vector-based graphics, presentations can also be resized without loss of clarity-a boon to users with visual impairments.
A recent development in Flash technology is the ability to include native Flash captions within the presentation itself. NCAM developed CC For Flash, a Flash component that allows Flash developers to easily incorporate closed captions within Flash movies. It supports closed caption files which can be created using MAGpie, and can be used on all types of Flash movies, including Flash video (using external caption files or internal cuepoints), sound objects, and native timelines. Developers can set various text attributes, including font face, font size, foreground color, text box size, opacity and background color. Versions of CC For Flash are available for Actionscript 2 and 3 projects. For those situations where Flash programming is not possible, ccplayer is also available. ccPlayer is a completely accessible, precompiled Flash movie player which allows a web master to easily embed a caption-enabled media player directly in a web page.
Checkpoint H1
Add audio descriptions to multimedia presentations.
Multimedia is often used to convey educational content. Without audio descriptions, students who are blind are at a distinct disadvantage as they have to depend on teachers or classmates to obtain the visual information. Students may be reluctant to ask others to describe the visuals to them, and untrained classmates or even teachers may not provide descriptions that meet the student's specific educational requirements. The techniques explained below show how to add audio descriptions to three popular multimedia formats.
Creating meaningful audio descriptions requires specialized training in how best to convey visual images verbally. The narration should be carefully written to fit precisely into the natural pauses in the program dialog. In cases where a longer description is necessary but there is not a sufficient pause in the program audio to accommodate it, consider authoring extended audio descriptions. In this situation, the program dialog and video are paused while the audio description plays. When the description has finished playing, the video and dialog resume playback. Extended and "regular" descriptions may be mixed in a single multimedia presentation.
When creating described multimedia presentations, it may be best to contact one of the resources listed in Appendix 2, Closed Captioning and Audio Description Resources, since these organizations have expertise in providing audio descriptions for an array of media (broadcast television, movies on video and multimedia). Check with service providers to be sure they can deliver the final product in your preferred file format.
Where budgetary constraints exist, or where it is simply more practical and convenient, students, teachers or others knowledgeable in the specific subject matter may be trained to write audio descriptions. As with image descriptions, audio-description writers should have good writing skills and an excellent command of the vocabulary associated with the subject, as well as adequate access to reference and support materials, such as textbooks and dictionaries, in order to ensure that the descriptions are as clear and accurate as possible. Finally, the descriptions should be reviewed by someone other than the original writer.
Two recently published resource can help those looking to create accurate and meaningful audio descriptions. The Described and Captioned Media Program (DCMP)-run by the National Association of the Deaf and funded by the U.S. Department of Education-recently published a set of description guidelines for educational media. And NCAM recently published Effective Practices for Description of Science Content in Digital Talking Books with funding by the National Science Foundation.
Technique H1.1
Add audio descriptions to movies using MAGpie.
Both regular and extended audio descriptions can be digitally recorded and integrated into a SMIL presentation using NCAM's free utility, MAGpie 2.01. You may also use any sound-editing program, such as SoundForge or Audacity, to record the audio files, and then use MAGpie to integrate them into an accessible presentation. No matter how it is done, ensure that the descriptions convey as much information as necessary without being overly long. Describe all important details thoroughly, such as scientific or mathematical expressions, graphs and charts, and use a vocabulary that is appropriate to the subject matter or grade level.
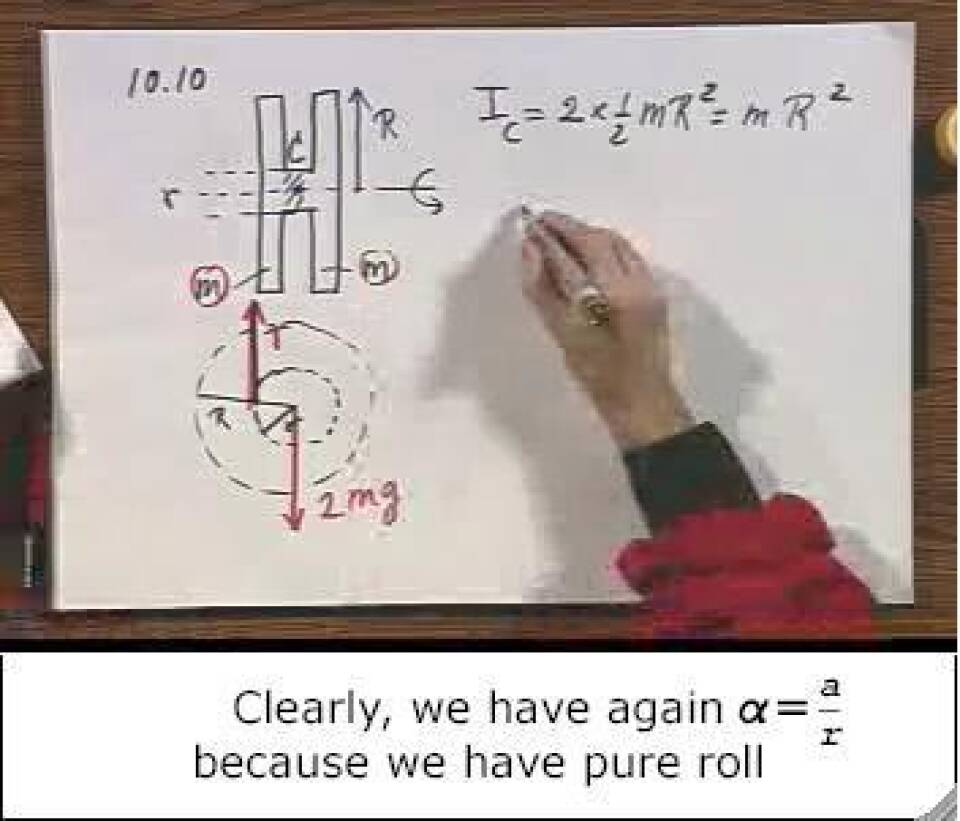
For the best results, record the descriptions in a quiet environment using a high-quality microphone. To minimize errors or ambiguity, speak clearly and use a written script. Finally, when integrating the descriptions into the multimedia, time them precisely to play at the appropriate intervals when they will be the most useful. For example, if the video shows a professor writing an equation on a blackboard, wait until he has finished writing the entire equation before inserting the description describing what has been written.
Complete information on using MAGpie to create and synchronize audio descriptions may be found in the MAGpie on-line documentation.
Technique H1.2
Integrate audio descriptions into multimedia presentations using SMIL.
SMIL SMIL provides information about layout, synchronization and display of different media types for the player to interpret. The RealPlayer, GRiNS Player, Ambulant Player and the QuickTime Player all use SMIL to integrate audio descriptions into a multimedia presentation. In addition, SMIL provides test attributes that can be used to programmatically determine, among other things, the viewer's player preferences for captions and descriptions. The RealPlayer and Ambulant Player, for example, support the SMIL test attributes for captions (systemCaptions) and descriptions (systemAudioDesc), while the Quicktime Player does not.
You can use MAGpie to author accessible SMIL presentations, as described in Technique H1.1, but if you wish to write SMIL code yourself, details are provided here. The RealPlayer and Ambulant Player provide reliable support for the current SMIL recommendation. Support for SMIL in the QuickTime Player is selective, so test your presentation thoroughly before making it available publicly. Also read about QuickTime's support for SMIL at Apple's Developer Connection site.
SMIL 2.x and audio descriptions
When creating a described presentation for a SMIL player, you must write a SMIL file that contains pointers or references to the video file and all audio-description sound files. MAGpie will do this automatically for you. Here is some sample code showing instructions on how and when the player will play the video and audio descriptions.
<par dur="0:01:46.27"> <video dur="0:01:46.27" region="videoregion" src="mymovie.rm"/> <audio begin="0:00:14.30" src="ad1.rm" systemAudioDesc="on"/> <audio begin="0:00:28.16" src="ad2.rm" systemAudioDesc="on"/> </par> <dur>) of 0:01:46.27 (timecodes are represented as hours:minutes:seconds.frames, although other units may also be used). The SMIL file is instructing the player to play the video track (mymovie.rm) in parallel (<par>) with the two audio tracks (ad1.rm and ad2.rm). The first audio description will play at the timecode 0:00:14.30, and the second at 0:00:28.16. The test attribute systemAudioDesc is used to determine whether or not to actually play the audio descriptions, based on the multimedia player's preferences settings. If the user has set the player's preferences to play audio descriptions, those descriptions will be played at the intervals stated in the SMIL file. If not, they will be ignored. Here is a picture of the RealPlayer's accessibility preference settings, showing choices for both audio descriptions and captions.
<excl>) may be used to sequence an "extended" audio description by informing the player that the main media (and other tracks, such as captions) should be paused until the interrupting element-- the audio description-- has finished playing. These extended audio descriptions will lengthen the overall duration of the presentation, but they provide an effective method for adding description when it is most needed. The following example shows the code that specifies an extended audio description:
<excl dur="indefinite"> <priorityClass peers="pause"> <video src="mymovie.rm" region="videoregion"/> <audio src="ad1.rm" begin="85.5s" systemAudioDesc="on"/> <audio src="ad2.rm" begin="164.5s" systemAudioDesc="on"/> </excl> mymovie.rm is paused at 85.5 seconds while the first description (ad1.rm) plays. When ad1.rm is finished playing, the video will resume playing. At 164.5 seconds into the original timeline, the video pauses again while the second description (ad2.rm) plays, then resumes when the description is finished. SMIL 1.0 and extended audio descriptionsAt the time these guidelines were written, support by the RealPlayer and the QuickTime Player for programmatically inserting extended audio descriptions was not complete (Ambulant Player's implementation of SMIL 2.1 does include support for this feature, however). Instead, authors who wish to incorporate extended audio descriptions may do so using a SMIL 1.0 workaround for the RealPlayer or embedded tracks for the QuickTime Player (see later in this section). The SMIL 1.0 solution is illustrated in the code below.
<par> <video src="mymovie.rm" region="videoregion" clip-end="85.5s" dur="96.7s" fill="freeze"/> <audio src="ad1.rm" begin="85.5s"/> </par> <par> <video src="mymovie.rm" region="videoregion" clip-begin="85.5s" clip-end="164.5s" dur="82.3s" fill="freeze"/> <audio src="ad2.rm" begin="79s"/> </par> mymovie.rm pauses at 85.5 seconds, allowing the first extended description (ad1.rm) to play for its full length of 11.2 seconds (from 85.5 to 96.7 seconds). Once the description has finished playing, the video resumes playing at 85.5 seconds until 164.5 seconds, at which time it pauses while ad2.rm plays for its full length of 82.3 seconds. This process is repeated as many times as there are extended audio descriptions. Note that this workaround only works with the RealPlayer. It is not an ideal solution-- among its drawbacks is a brief black flash between the time the audio description ends and the next video segment begins-- but it can be used as a temporary solution until the target multimedia player supports SMIL 2.x's extended audio description capabilities. Technique H1.3
Embed audio-description tracks in QuickTime movies.
While audio descriptions may theoretically be incorporated into QuickTime presentations using SMIL, Apple's support for SMIL is selective, so not all features are available. Test your presentation thoroughly before making it available publicly, and read about QuickTime's support for SMIL at Apple's Developer Connection site. In cases where SMIL is not appropriate or reliable, authors should embed the description track into the movie itself.
In a QuickTime movie, sound, video and text are contained in separate tracks. Sound tracks to accommodate different languages or audio descriptions can be added easily. The following instructions show how to add audio descriptions that fit into the pauses in the movie's dialog or program narration. The method applies to QuickTime Player for both Macintosh and Windows, with slight variations in keyboard commands.
- Open the QuickTime Player and the clip to be described. Choose Show Movie Properties from the Window menu, or press Command-J on Macintosh, or Ctrl-J in Windows.
- Using any sound-recording software (such as SoundForge or Audacity), record and edit the first description to be incorporated into the movie clip. Open this audio clip in a new window in QuickTime Player, then select, or highlight, the entire sound clip (or the portion you want to insert into the movie clip) and choose Copy from the Edit menu.
- In the QuickTime Player with the video, move the slider to the end of the pause where the description will go. Press the O key to place the Out selection marker at that point.
- Move the slider backwards until you reach the beginning of this pause. Press the I key to place the In selection marker at that point. This selects the segment of the movie clip that will receive the audio description.
- Open the Edit menu and choose Add to Movie. This adds the description to the movie as a new sound track. In the track listing at the top of the Show Movie Properties window, you will see that "Sound Track 2" is now one of the menu choices.
- Play the clip to hear the narration you've just inserted.
- Repeat steps 2-5 to insert subsequent audio descriptions. Always remember to select the segment that will contain the audio description by first going to the end of that segment and then moving the slider backwards to the beginning. If you do not do this, the QuickTime Player will add the description to the end of the segment, rather than the beginning.
QuickTime can also incorporate extended audio descriptions, using a similar method. The process described below simulates a pause in the movie by playing a still-frame for the duration of an extended description.
- Open the QuickTime movie.
- Find the first spot in the movie where the video will pause and the extended audio description will play.
- Select Export... from the File menu.
- At the bottom of the dialog box, change the Export: combo box to Movie to Picture, and the Use: combo box to Uncompressed. This will export the frame that is currently in view. Click on the Save button after noting (or changing) the filename.
- Using the sound-recording software of your choice, record and edit the first description you want to incorporate into the movie clip.
- Open a new QuickTime Player window and then open the file you created in step 4.
- Choose Select All from the Edit menu, and then choose Copy from the Edit menu.
- Open a new QuickTime Player window, and open the audio-description you recorded in step 5.
- Choose Select All from the Edit menu.
- Select Add To Selection and Scale from the Edit menu.
- Save the combined sound/image file
- Choose Select All from the Edit menu and then choose Copy from the Edit menu.
- Click once on the window with the movie into which the extended audio descriptions will go.
- Assuming that the slider has not been moved since the image was exported, choose Paste from the Edit menu. If the slider has moved, locate the exact point in the movie where the movie matches the exported image before pasting.
- Repeat steps 1-13 as needed for other extended audio descriptions.
- Save your work frequently, always saving the movie as a self-contained file.
Technique H1.4
Add audio descriptions to Windows Media.
Windows Media currently has no support for closed audio descriptions, but audio descriptions (regular or extended) can be integrated into a Windows Media presentation by recording them along with the regular program audio. Since these descriptions are open (that is, they can't be turned off), authors should also provide a separate version of the presentation with the original program audio (without audio descriptions).
Checkpoint H2
Add closed captions to multimedia presentations.
The inclusion of closed captions in educational multimedia presentations dictates whether the student who is deaf or hard-of-hearing is an active learner or a passive learner when the media is used on-line or in class. While a good percentage of the presentation may be visual, any audio that complements the visual information must be captioned.
Providing closed captions is significantly different from providing a text transcript of the audio portion of the presentation (although it is recommended always to provide a text transcript in addition to captions, since transcripts provide an easy way to scan a movie's script, to search for particular terms, and can also be converted to braille.) For example, captions use special techniques to identify speakers and sound effects. And since the caption text is synchronized with the video, it is easier for viewers to associate the captions with the whole presentation. Because writing captions can be a complex process, it may be best to contact one of the resources listed in Appendix 2, to have the work done for you.
Where budgetary constraints exist, or where it is simply more practical and convenient, students, teachers or others knowledgeable in the specific subject matter may also write captions. Anybody with excellent writing, spelling and listening skills can write captions but, if possible, use people who demonstrate sufficient expertise in the subject at hand. Captioners must have adequate access to reference and support materials, such as textbooks and dictionaries, in order to ensure that the captions are as accurate as possible. Finally, the captions should be reviewed for accuracy by someone other than the original writer.
Technique H2.1
Write captions for multimedia presentations using MAGpie.
The easiest method for adding captions to multimedia presentations is to use NCAM's free captioning utility, MAGpie. MAGpie allows authors to write captions once and output them in formats for RealNetworks' RealPlayer, Oratrix's GRiNS Player, Apple's QuickTime Player and Microsoft's Windows Media Player. These players each use proprietary text-display formats, so captions that play in one player will not play in another (except for the GRiNS Player, which plays RealNetworks' RealText format). Read complete information on using MAGpie to create and synchronize captions on the MAGpie Web site.
As of this writing, there are serious shortcomings with the display of scientific and mathematical expressions in captions. No standard method exists for displaying complex math or science notation within multimedia players. (Existing mathematical markup languages, such as MathML, are not yet supported in multimedia players.) Therefore, representing anything beyond simple mathematical expressions in captions can only be accomplished via text.
One interim solution to the problem of displaying math symbols in captions is to use Scalable Vector Graphics (SVG) in place of text captions. Using SVG, fonts can be embedded in the caption file and rendered in an SVG viewer which itself is integrated into a multimedia player. SVG captions can be created by transforming a MAGpie 2.01 XML file to SVG-currently a process that requires the use of additional software and a good deal of manual coding. The only major multimedia player with SVG support is the RealPlayer for Windows, using the Adobe SVG Viewer plug-in.
Below is a example of a complex expression rendered in SVG.
Technique H2.2
Embed captions in QuickTime movies
Some authors may prefer to embed captions directly into a QuickTime movie rather than use SMIL. Doing so will increase the size of the movie somewhat (how much so will depend on how many captions are in the presentation), which may increase download times, but it will guarantee that the caption track is delivered to the user.
To embed captions, first author the caption track in MAGpie as described in Technique H2.1. Output the presentation as SMIL for QuickTime and then follow the procedure outlined below.
1. Open the QuickTime Player.
2. Open the File/Open Movie in New Player dialog box (Ctrl+O in Windows, Apple+O on Macintosh). Browse to the caption file created during the MAGpie export process, named projectname.qt.txt. The caption file will open in QuickTime as a caption track, as shown below.
3. Select the entire movie track by choosing Edit/Select All, or by pressing Ctrl+A (Command+A on Macintosh).
4. Copy the entire track by choosing Edit/Copy, or by pressing Ctrl+C (Command+C on Macintosh).
5. From the File/Open dialog, open the original (uncaptioned) video file.
6. Place the slider at the beginning of the movie track, then choose Edit/Add to Movie. The caption track will be added to the movie, but will be placed at the top of the video region, as shown below.

1. Reposition the caption track: From the Window menu, choose Show Movie Properties (or press Ctrl+J (Command-J on Macintosh)), choose Text Track. Select the Visual Settings tab. In the Offset area, type in the new position. The first entry is the X (width) position; the second entry is the Y (height) position. Position the caption region so the top edge of the caption track just touches the bottom edge of the video track.

2. Once the track is properly positioned, close the Show Movie Properties dialog.
3. Choose File/Save As..., and save the file as a self-contained movie.
Technique H2.3
Add audio-description and caption controls to QuickTime multimedia presentations.
While the QuickTime Player allows users to toggle all embedded movie tracks on and off via the Show Movie Properties dialog, this feature is only available to users who purchase an upgrade to the "pro" version of the player (approximately $30). However, authors can add buttons to the player interface for easier toggling of tracks. These buttons are available to all users, whether they purchased the upgrade or not. Such a feature is crucial when embedding a player into a Web page, and can also provide control of accessibility tracks in movies embedded into some e-books. Below is a picture of caption and description buttons integrated into the QuickTime Player interface.
To add control elements to a QuickTime movie, you will need the following:
- QuickTime Pro
- Control elements; download from the NCAM site or make your own using LiveStage from Totally Hip software.
- A QuickTime movie with captions and/or audio descriptions
For simplicity, this example assumes the use of two of NCAM's caption-control elements: captions-buttons and captions-labels. Follow the steps below to add these control elements to your QuickTime movie.
- Open the QuickTime movie.
- Open Window/Show Movie Properties, or press Ctrl+J (Command-J on Macintosh). From the track list at the top of the window, double-click on "Text Track," and rename it to "captions." Special note: QuickTime 7 for Windows introduced a bug that prevents users from renaming tracks (this bug is not present in QuickTime 7 for the Macintosh).
- Choose File/Open Movie in New Player (Ctrl+O in Windows, Apple+O on Macintosh) and open the element named captions-buttons.
- Copy the entire track by choosing Edit/Select All, or by pressing Ctrl+A (Command+A on Macintosh). Copy the track by choosing Edit/Copy or by pressing Ctrl+C Command+C on Macintosh).
- Click once on the window containing the captioned or described movie.
- Make sure the slider is positioned at the beginning of the clip. Choose Edit/Add to Selection and Scale.
- Repeat steps 3-6 for the element named captions-labels.
- Reposition the elements: in Windows/Show Movie Properties, click once on the captions-buttons track from the track list at the top of the window. Select the Visual Settings tab. In the Offset area, type in the new position. The first entry is the X (width) position; the second entry is the Y (height) position.
- Repeat step 7 for the captions-labels button.
Technique H2.4
Integrate captions into multimedia presentations using SMIL.
RealPlayer, the QuickTime Player, the Ambulant Player and Oratrix's GRiNS Player use the W3C's Synchronized Multimedia Integration Language (SMIL) to sequence captions in a multimedia presentation. SMIL provides information about layout, timing and display of different media types (such as video and text) for the player to interpret. In addition, SMIL provides test attributes that can be used to programmatically determine, among other things, the viewer's preferences for captions and descriptions.
When creating a captioned presentation for a SMIL player, authors must write a SMIL file that contains pointers or references to the video file and the text file containing the captions. MAGpie will do this automatically (see Technique H2.1). If you need to author a captioned SMIL presentation in some other way, such as with a text editor, create a file using the code samples below as a guide.
<layout> section of a SMIL file. <layout> <root-layout backgroundColor="black" height="284" width="340"/> <region id="videoregion" backgroundColor="black" top="2" left="5" height="212" width="340"/> <region id="textregion" top="214" left="5" height="70" width="340"/> </layout> <layout> tags instructs the player to draw two regions, one for video (<videoregion>) and one for text (<textregion>). Height and width are sized in pixels. Note that the top edge of the text region (top="214") is positioned so that it nearly touches the bottom edge of the video region (height="212"). This will place the captions in a box directly below the video region. Below is some sample code showing the body of the SMIL file, where the player is given instructions on how and when to play the video and captions.
<par> <video src="mymovie.rm" region="videoregion"/> <textstream src="captions.rt" region="textregion" systemCaptions="on"/> </par> <par>) tags states that the two source files (one for video and one for captions) should be started at exactly the same time and be played in parallel, thus synchronizing the captions with the program audio. Since no start time is specified, SMIL assumes all elements will begin playing at time 0:00:00.0 (timecodes are represented as hours:minutes:seconds.frames, although other units may also be used). The systemCaptions test attribute is used to determine whether or not to actually play the captions, based on the multimedia player's preferences settings. If the user has set the player's preferences to play captions, those captions will be played at the intervals stated in the text file. If not, they will be ignored. Here are pictures of the RealPlayer and GRiNS accessibility preference settings, showing choices for both audio descriptions and captions.
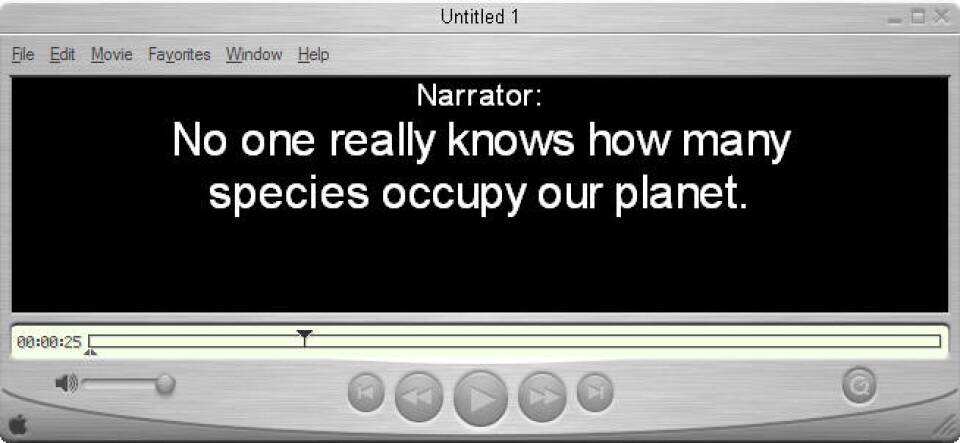
Here are pictures of a movie with and without closed captions.
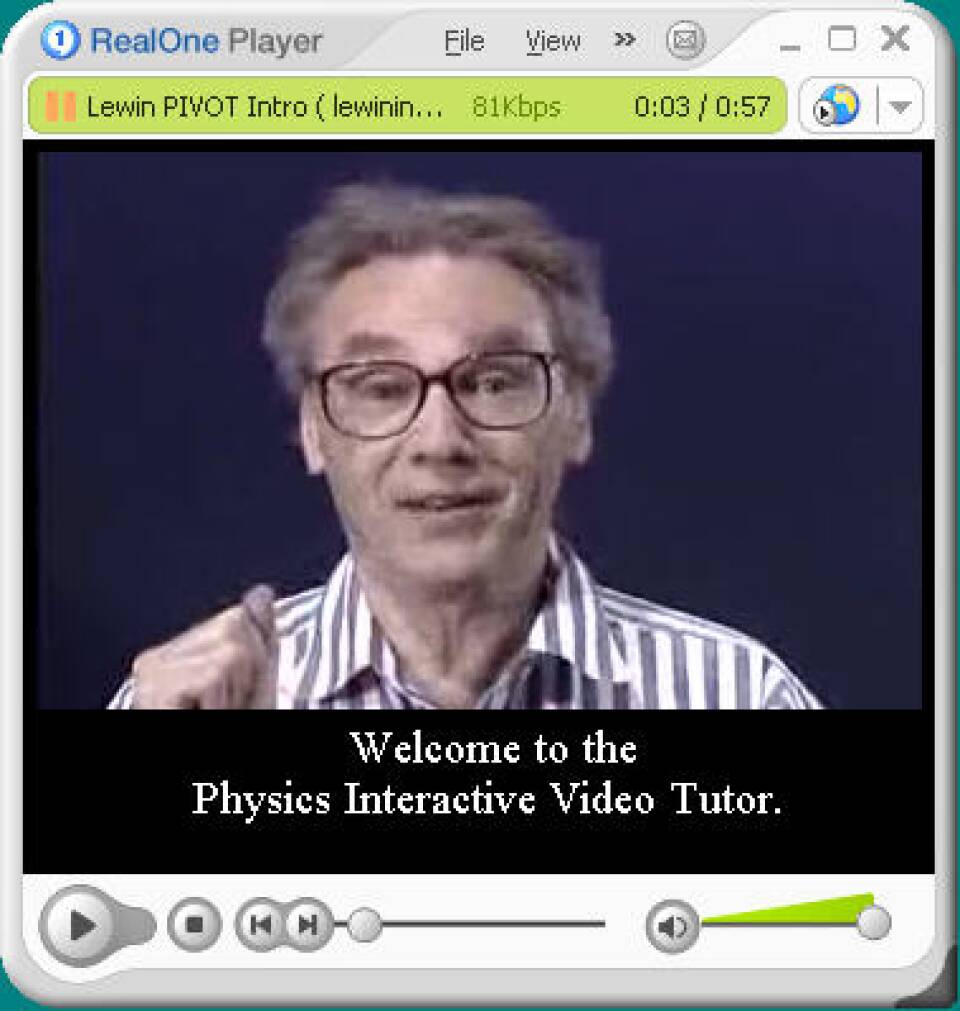

The caption file contains the actual captions and timecodes for the multimedia presentation, as shown below.
<time begin="00:00.0"/><clear> Hello! <time begin="00:01.3"/><clear> Welcome to the<br> Physics Interactive Video Tutor. <time begin="00:04.6"/><clear> I'm Walter Lewin,<br> your virtual tutor. [00:00:00.20] {justify:center}{size:18}{font:times new roman}Hello! [00:00:01.30] Welcome to the Physics Interactive Video Tutor. [00:00:04.60] I'm Walter Lewin, your virtual tutor. src attributes of the video or textstream elements. To test, open the SMIL file in the RealPlayer. Technique H2.4.1
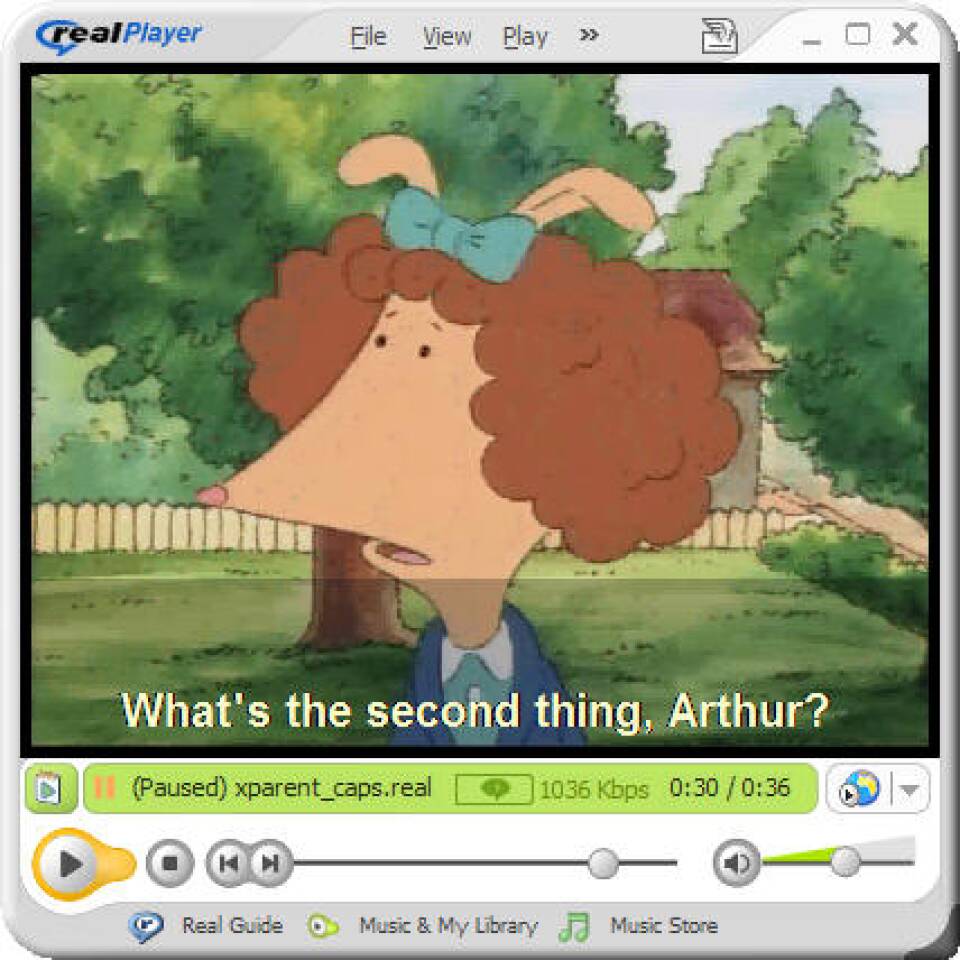
Integrate transparent- or translucent-background captions using SMIL in RealPlayer.
Instead of placing the caption region below the video region, as illustrated above, it is possible to display captions directly over the video region using a transparent background. RealPlayer supports both transparent-background displays (as does QuickTime; see Technique H2.4.2).
Displaying transparent-background captions in the RealPlayer is accomplished through the use of SMIL in combination with extensions unique to RealPlayer. The steps below outline the procedure.
- Create captions with MAGpie, and choose Export/RealPlayer when finished.
- Open the project's SMIL file (filename.real.smi) in a text editor. Replace the
<SMIL>declaration with the following:<smil xmlns=http://www.w3.org/2000/SMIL20/CR/Language xmlns:rn="http://features.real.com/2001/SMIL20/Extensions/alphaControl"> - Add the following to the
<textstream>declaration in the<body>:rn:backgroundOpacity="0%". This will make the text region transparent. - Specify the text region's dimensions by altering the height and width in the
<textregion>area of<layout>. For example:<region id="videoregion" height="300" width="400" background-color="black" left="5" top="5"/> <region id="textregion" height="70" width="400" left="5" top="230"/>
In this code sample,<videoregion>has a height of 300 pixels and a width of 400 pixels.<textregion>has a height of 70 pixels and a width of 400 pixels. - Specify the location of the caption region within the player window by altering the coordinates in
<textregion>. In the code shown in step 4,top="230"places the top edge of the caption region 230 pixels from the top edge of the player, andleft="5"refers to the five-pixel indent from the left edge of the player. (Captions look best when there is a small amount of padding between the left edge of the caption region and left edge of the player.) Since the entire video region has a height of 300 pixels (height="300"), the caption region will occupy the lower 70 pixels of the video area. - Specify the text color. Open the RealText caption file (filename.real.rt) using any text editor. In the header, alter
font color="#RRGGBB"to represent the color you want, where RRGGBB represents red/green/blue hexadecimal values.
Below is an image illustrating transparent-background captions as they appear in the RealPlayer.
If legibility is a problem, use a translucent region rather than a transparent one. To do so, specify a background color in the RealText caption file (filename.real.rt) file by adding background="color" to the header, where "color" represents the background color you want (e.g., background="black"). In the SMIL file, change the value in rn:backgroundOpacity="X%" to a percentage that represents the degree of opacity. The image below illustrates a black background with 25% opacity (rn:backgroundOpacity="25%").
When managing SMIL and caption files, some authors find it convenient to save the caption file in the same directory as the SMIL and video files. However, if you want to save them in separate locations, ensure that the paths specified in the SMIL file reflect the correct locations of the video and text elements. You can change the path information at any time by opening the SMIL file in a text editor and adding the new paths to the src attributes of the video or textstream elements. To test, open the SMIL file in the RealPlayer.
Complete documentation for adding effects to RealText captions can be found in the RealNetworks Production Guide.
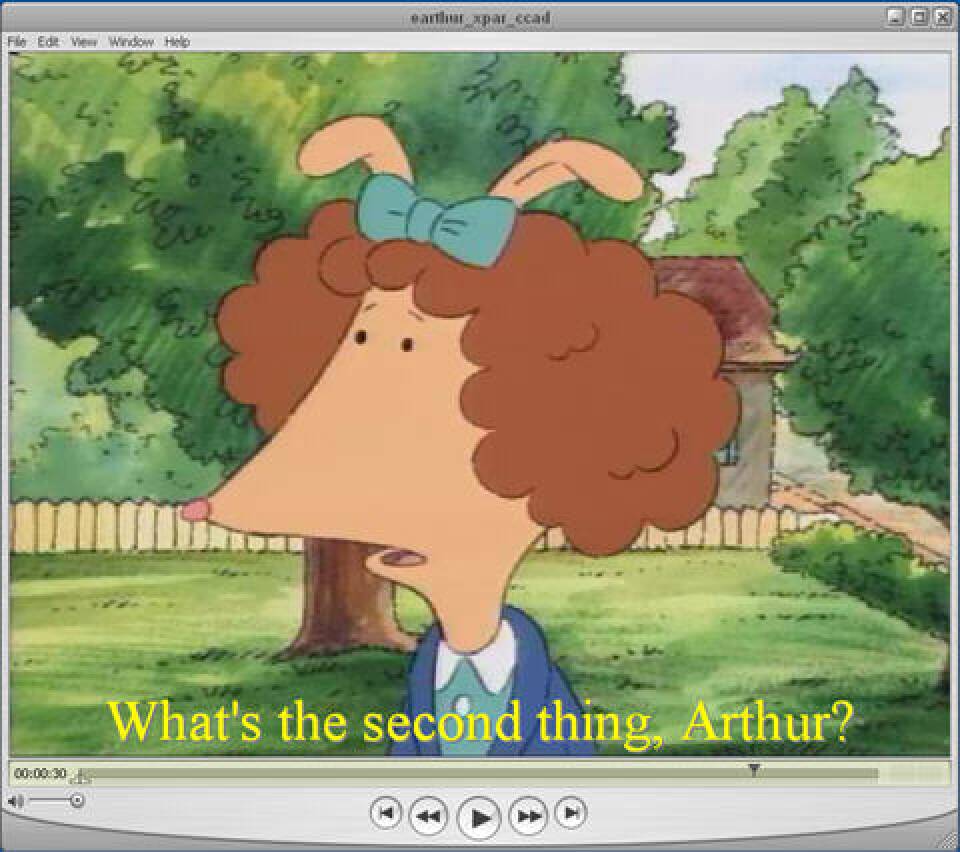
Technique H2.4.2
Integrate transparent- or translucent-background captions into multimedia presentations for the QuickTime Player.
Displaying transparent-background captions in the QuickTime Player is accomplished through the use of embedded tracks or SMIL in combination with extensions unique to QuickTime. The steps for both approaches are outlined below.
- Create captions with MAGpie. Choose Export/QuickTime when you're finished.
- Open the caption file (projectname.qt.txt) in a text editor.
- In the header, add
{keyedText:on}. This will create the transparent caption region. - To improve legibility of the text, add a drop shadow to the captions by adding
{dropShadow:on}to the header. To adjust the characteristics of the drop shadow, use{dropShadowOffset:X,Y}, whereXspecifies the number of pixels to offset the shadow to the right, andYspecifies the number of pixels to offset the shadow downward. Values of1,1are often sufficient. Finally, you may want to use{dropShadowTransparency:X}, which specifies the intensity of the drop shadow.Xcan be any value from 0-255. - Adjust the height of the caption region by adding
{height=X}to the header, whereXrepresents the height of the region in pixels. - Specify the color of the text by adding
{textColor:R,G,B}to the header, where R=red, G=green and B=blue. Each value can range from 0-65535. - If you find that the text edges look ragged, you can smooth them by adding
{anti-alias:on}to the header. - Embed the track as described in Technique H2.2. When positioning the caption region in its new location (step 7 in H2.2), be sure to align the bottom edge of the region with the bottom edge of the video region, as shown below.


To learn more about QuickTime's text-track features, read the complete documentation about text descriptors at the Apple site.
Transparent-background caption tracks with SMIL in QuickTime
When possible, integrate transparent-background captions with SMIL. To do so, follow steps 1-7 for embedding transparent-background captions in QuickTime. Rather then embedding the caption track manually, however, SMIL will overlay it in the presentation on the fly.
After generating the SMIL file in Magpie, open the SMIL file (filename.qt.smil) in a text editor and adjust the textregion top value to place the transparent text region over the video, rather than below it (which is MAGpie's default). For example:
Here, the entire videoregion has a height of 300 pixels. The top edge of the textregion is placed 240 pixels from the top of the presentation, and has a height of 60 pixels. Because {keyedText:on} has been added to the QText file, however, the background of the 60-pixel region will be rendered transparent, and the caption text will appear in this region directly over the video.
When managing SMIL and caption files, some authors find it convenient to save the caption file in the same directory as the SMIL and video files. However, if you want to save them in separate locations, ensure that the paths specified in the SMIL file reflect the correct locations of the video and text elements. You can change the path information at any time by opening the SMIL file in a text editor and adding the new paths to the src attributes of the video or textstream elements. To test, open the SMIL file in the QuickTime Player.
Embedded translucent-background caption tracks in QuickTime
1. Follow steps 1-8 for creating embedded transparent-background captions.
2. Open a text editor and create a caption-background track by entering the following text: {QTtext}{timescale:100}{width:400}{height:57}
[00:00:00.00]
[00:00:36.20]
Note that the last timecode shown above ([00:00:36.20]) should be altered to represent the entire length of the movie. Do not enter caption text, or any other text, in this file. Save the file with the extension .TXT (e.g., mask.txt).
3. Open the file you created in step 2 in the QuickTime Player. Copy and embed the background track as described in steps 3-7 of Technique H2.2. Note that the background track will appear solid black in color.
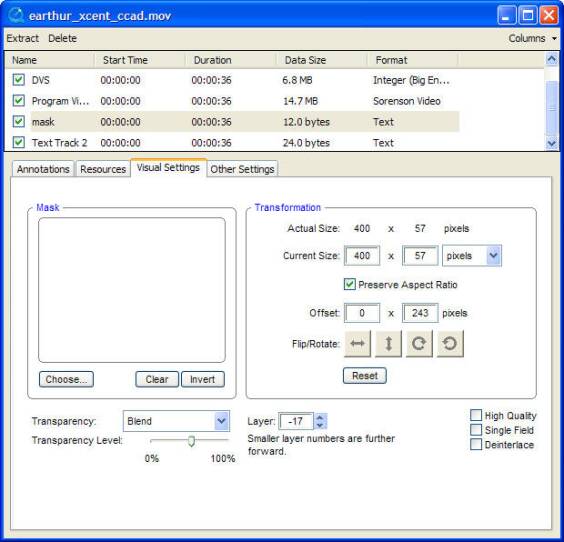
4. Open the Windows/Show Movie Properties dialog and click once on the background track from the track list at the top of the window. Choose the Visual Settings tab.
5. From the Transparency menu, choose Blend. Move the slider to the right or left to adjust the transparency of the background. Below is an image showing a 50% setting.
6. Reposition the caption track: in the Offset area, type in the new position. The first entry is the X (width) position; the second entry is the Y (height) position. Position the caption region so the bottom edge of the caption track just touches the bottom edge of the video track.
7. Close the Show Movie Properties dialog.
8. Choose File/Save As..., and save the file as a self-contained movie.
9. Open the movie in the QuickTime Player. If you find that the background needs to be adjusted, open the Show Movie Properties dialog again and change the setting as described in step 5, above.
Translucent-background caption tracks with SMIL in QuickTime
When possible, integrate translucent-background captions with SMIL. QuickTime's implementation of SMIL is selective, so test your presentation thoroughly before making it available publicly. Read about QuickTime's support for SMIL at Apple's Developer Connection site.
Translucent-background captions with SMIL is accomplished through the use of unique QuickTime attributes, as described below.
- Create captions with MAGpie. Choose Export/QuickTime when you're finished.
- Open a text editor and create a caption-background track by entering the following text:
{QTtext}{timescale:100}{width:400}{height:57}
[00:00:00.00]
[00:00:36.20]
Note that the last timecode shown above ([00:00:36.20]) should be altered to represent the entire length of the movie. Do not enter caption text, or any other text, in this file. - Save the file with the extension .TXT (e.g.,
mask.txt) in the same directory as the existing text track, movie and SMIL file. - Open the project's SMIL file (projectname.qt.smil) in a text editor. In the
<par>element, add the following line of code above the existing<textstream>declaration:<textstream region="textregion" src="mask.txt" qt:composite-mode="blend;X%"/>
qt:composite-mode="blend;X%"represents the level of opacity of the background. Adjust the X value as necessary (e.g.,"blend;40%") and save the file. - Open the SMIL file in the QuickTime Player. If the level of opacity is too dark or light, adjust it in the SMIL file as necessary.
When managing the video and text files, some authors find it convenient to save the caption file(s) in the same directory as the SMIL and video files. If you want to save them in separate locations, ensure that the paths specified in the SMIL file reflect the correct locations of the video and text elements.
Technique H2.5
Integrate captions into multimedia presentations using SAMI.
SAMI (Synchronized Accessible Multimedia Interchange) is a format from Microsoft used to display captions in Windows Media Player on the Windows OS only. Because it is HTML-based, it can take advantage of flexible display properties of that format.
As with SMIL, SAMI caption files can be created with MAGpie. Below is an excerpt from a SAMI file. Note that the formatting information is held in the section of the file, and the captions plus timing information are held in the <BODY>.
<SAMI> <HEAD> <STYLE TYPE="text/css"> P { font-size: 18pt; font-family: Times New Roman; font-weight: normal; color: #FFFFFF; background-color: #000000; text-align: center; } </STYLE> </HEAD> <BODY> <SYNC Start="3190"> <P Class="Captions">Hello!</P> </SYNC> <SYNC Start="6440"> <P Class="Captions">Welcome to the <br />Physics Interactive Video Tutor.</P> </SYNC> <SYNC Start="14620"> <P Class="Captions">I'm Walter Lewin, <br />your virtual tutor.</P> </SYNC> mymovie.wmv and mymovie.smi), and copy these files into the same directory. To launch the captioned presentation, open or link to the source media, not the SAMI file. However, for ideal file maintenance and to ensure that all Windows Media-compatible source material will play the associated SAMI file, store the video and SAMI files in separate directories and coordinate their playback using an ASX file. An ASX file contains the paths for the video and SAMI files (and other optional parameters), as shown below. <asx version="3.0"> <title>MyCaptionedMovie</title> <entry> <ref href="http://ncam.wgbh.org/movies/mymovie.asf?sami=http://ncam.wgbh.org/captions/mymovie.smi"/> </ref> </entry> </asx>
The video and SAMI sources are contained in a single HREF, separated only by a question mark (?) without spaces. Link to the ASX file, not the source media, to launch the captioned presentation in Windows Media Player. If you are embedding a Windows Media presentation in a Web page using <object>, point to the ASX file in the FileName parameter, not the base media. The video and SAMI sources are contained in a single HREF, separated only by a question mark (?) without spaces. Link to the ASX file, not the source media, to launch the captioned presentation in Windows Media Player. If you are embedding a Windows Media presentation in a Web page using <object> , point to the ASX file in the FileName parameter, not the base media.
To play Windows Media files in the QuickTime Player, download and install the free Flip4Mac software. SAMI files are not currently supported, however.
Contact NCAM
NCAM at GBH
One Guest Street
Boston, MA 02135